CMS Page Attributes v27.1+
A page attribute is a field that you add to every CMS page, for example a campaign code, an audience or a review date. The standard fields, such as Title and Content, are not page attributes. All the CMS pages use one attribute set. The groups of the set give the order of the fields, the tabs of a page in the admin and the tables on the storefront.
Add an attribute
- Go to System > Attributes > CMS Pages.
- Click Add.
- Enter the Attribute Code. Use only lowercase letters, numbers and underscores, and start with a letter. You cannot change the code later.
- Select the Input Type: Text Field, Text Area, Date, Yes/No, Multiple Select or Dropdown. You cannot change the input type later.
- Set Values Required to Yes if each page must have a value. Set Unique Value to Yes if two pages cannot have the same value.
- To show the value on the page, set Visible on Frontend to Yes in Frontend Properties.
- On the Manage Label / Options tab, enter the label. For a Dropdown or a Multiple Select, add the options.
- Click Save.
The code cannot be the name of a standard field, such as title, identifier or content. It also cannot be stores or store_id.
A new attribute goes into the first group of the set, so every page shows it at once.
Order and group the attributes
- Go to System > Attributes > CMS Pages and click Attribute Set.
- Drag the attributes to change their order. To make a new group, click Add above the groups.
- Click Save.
To hide an attribute on all the pages, drag it to Unassigned Attributes, and click Save. The page asks first. The pages keep their values, and show them again when you put the attribute back in the set.
To give a group a title in each language, click the group, then click Rename. In the row of each store view, enter the name in the language of that store view. A row that you leave empty shows the Admin name.
Fill in the attribute
Go to CMS > Pages and open a page. The Page Information tab shows the attributes of the first group of the set, under the standard fields. Each other group that holds an attribute is a tab of its own, with the name of the group.
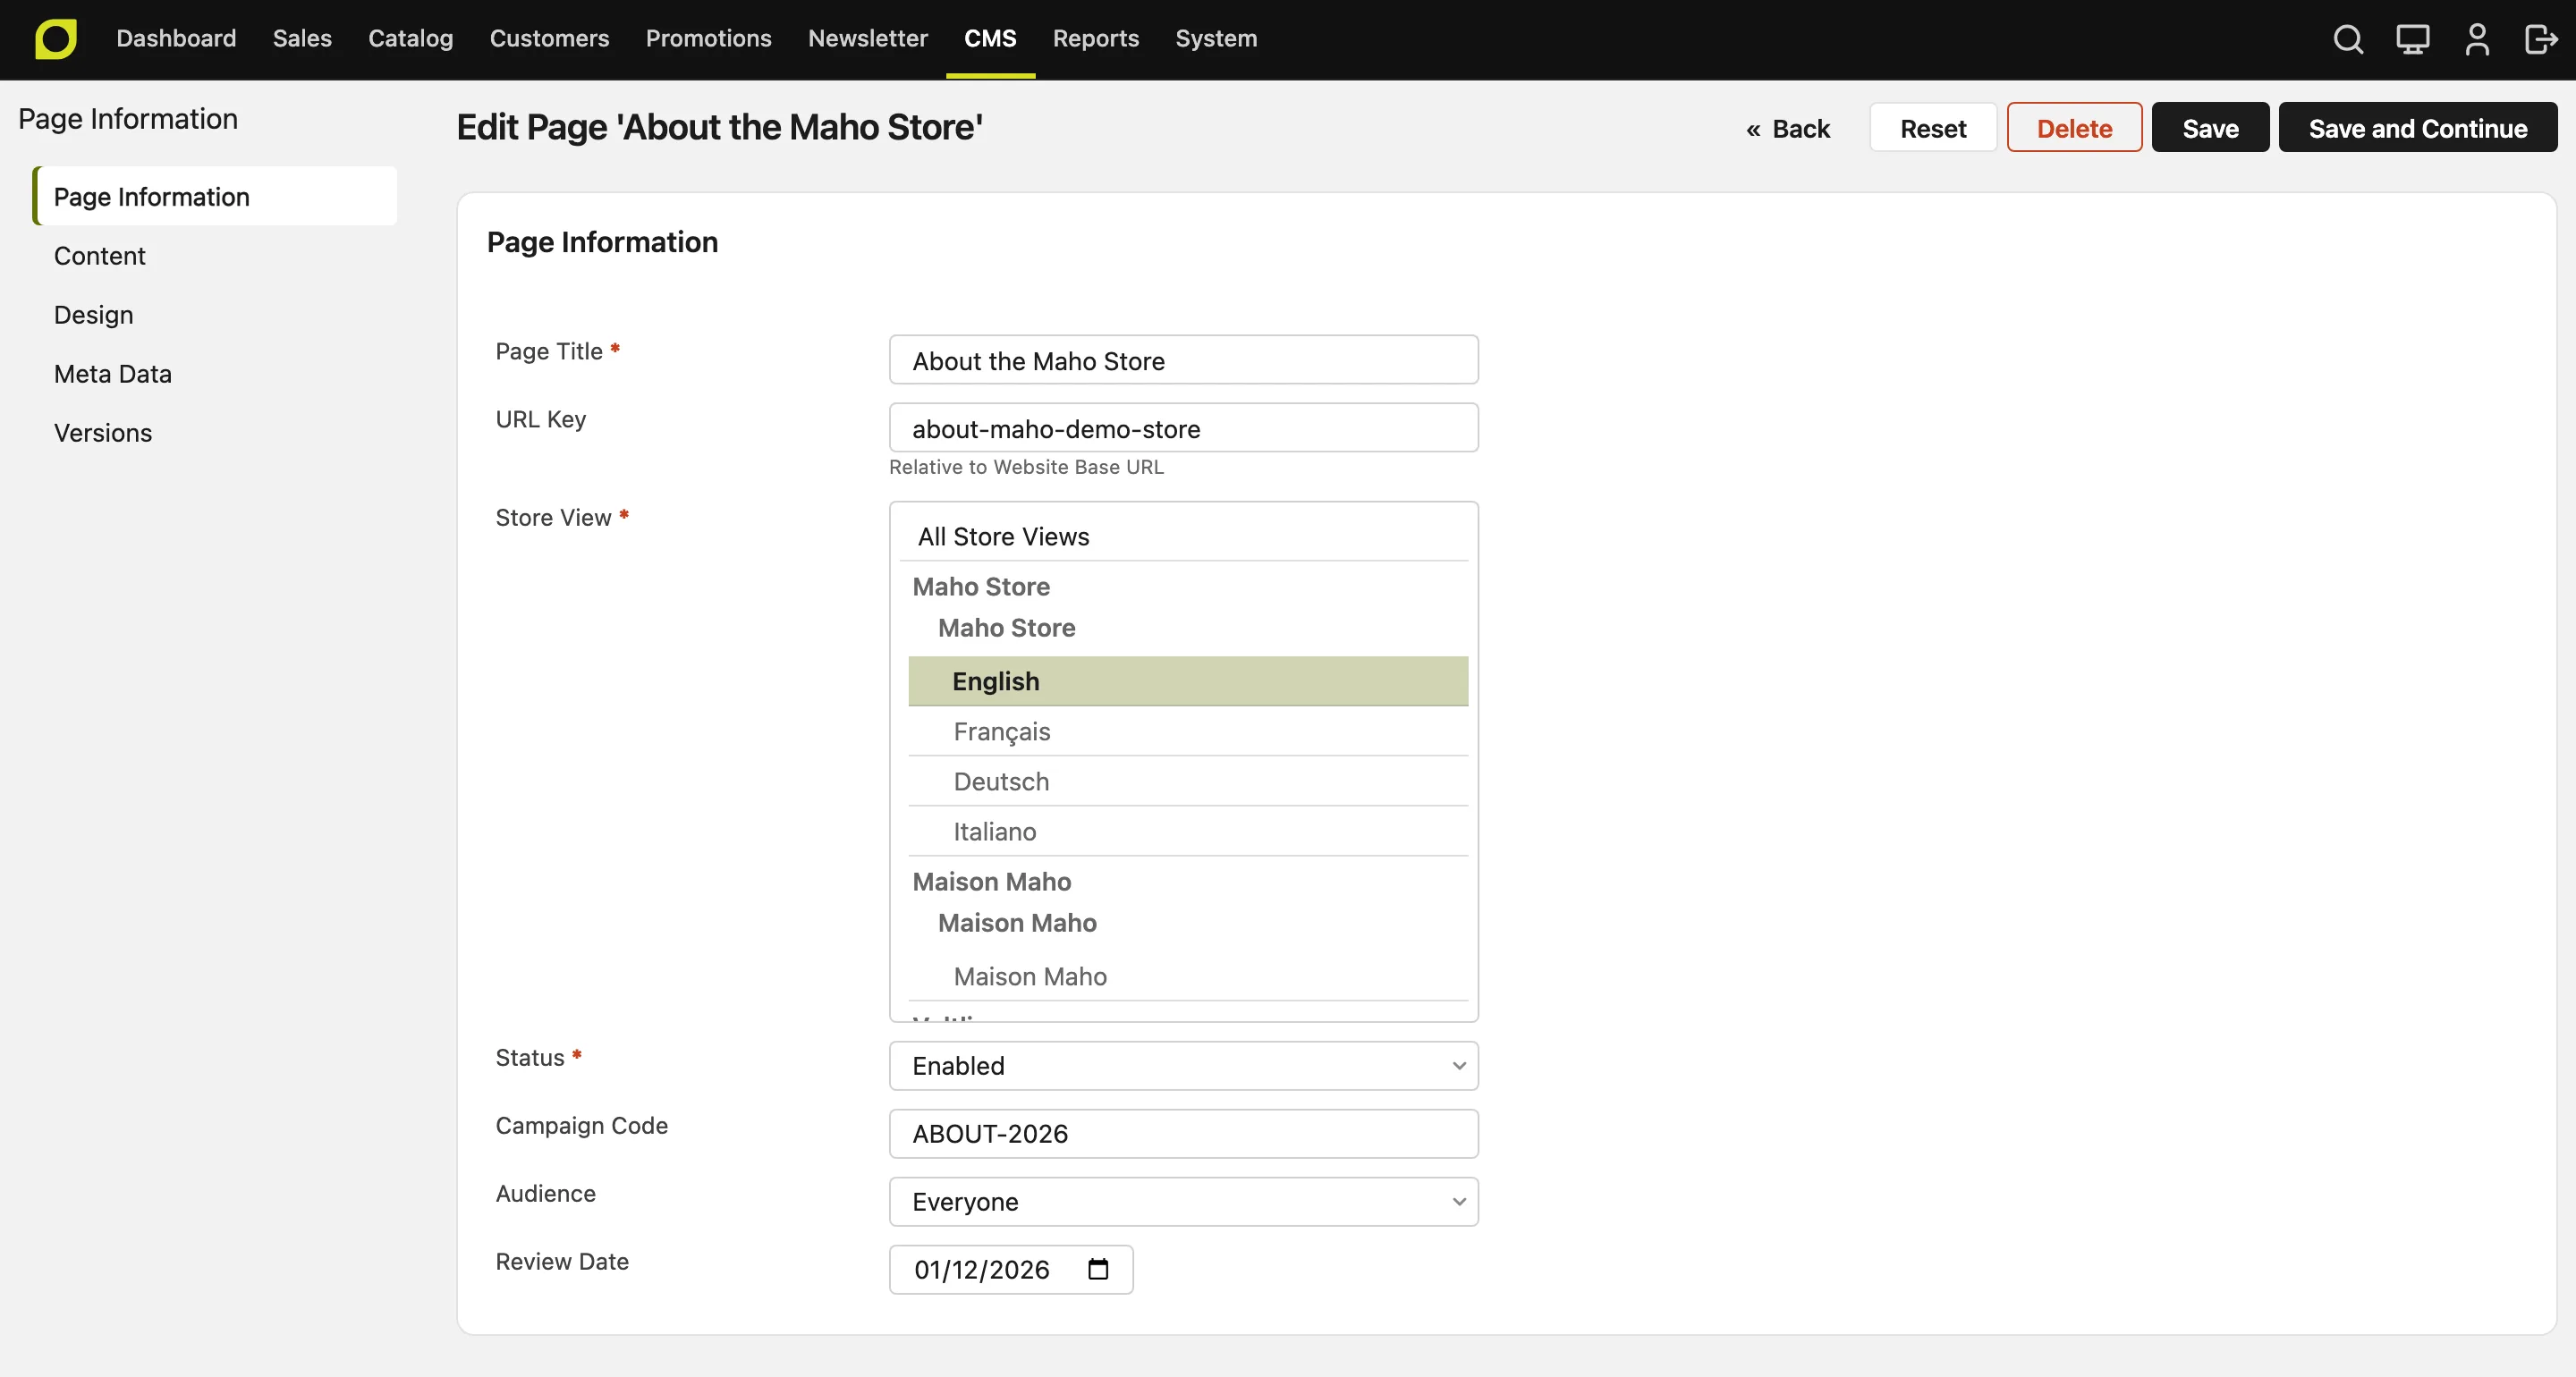
A new page gets the Default Value of each attribute. A page attribute has one value for all the store views of the page. A store with more than one language usually has one page for each store view, so each language gets its own value.
Delete an attribute
You can delete a page attribute on its edit page. The store deletes the attribute and the values of all the pages for it. You cannot undo this.
If you add an attribute with the same code again, the pages have no value for it.
Show a value on the storefront
Set Visible on Frontend to Yes in the Frontend Properties of the attribute. The page then shows the attribute and its value in a table below its content. A page with no value for the attribute does not show it.
Each group of the set is a table of its own, in the order of the groups. The table of the first group has the title Additional Information. Each other table has the name of its group, in the language of the store view. In each table, the attributes follow the order of the group.
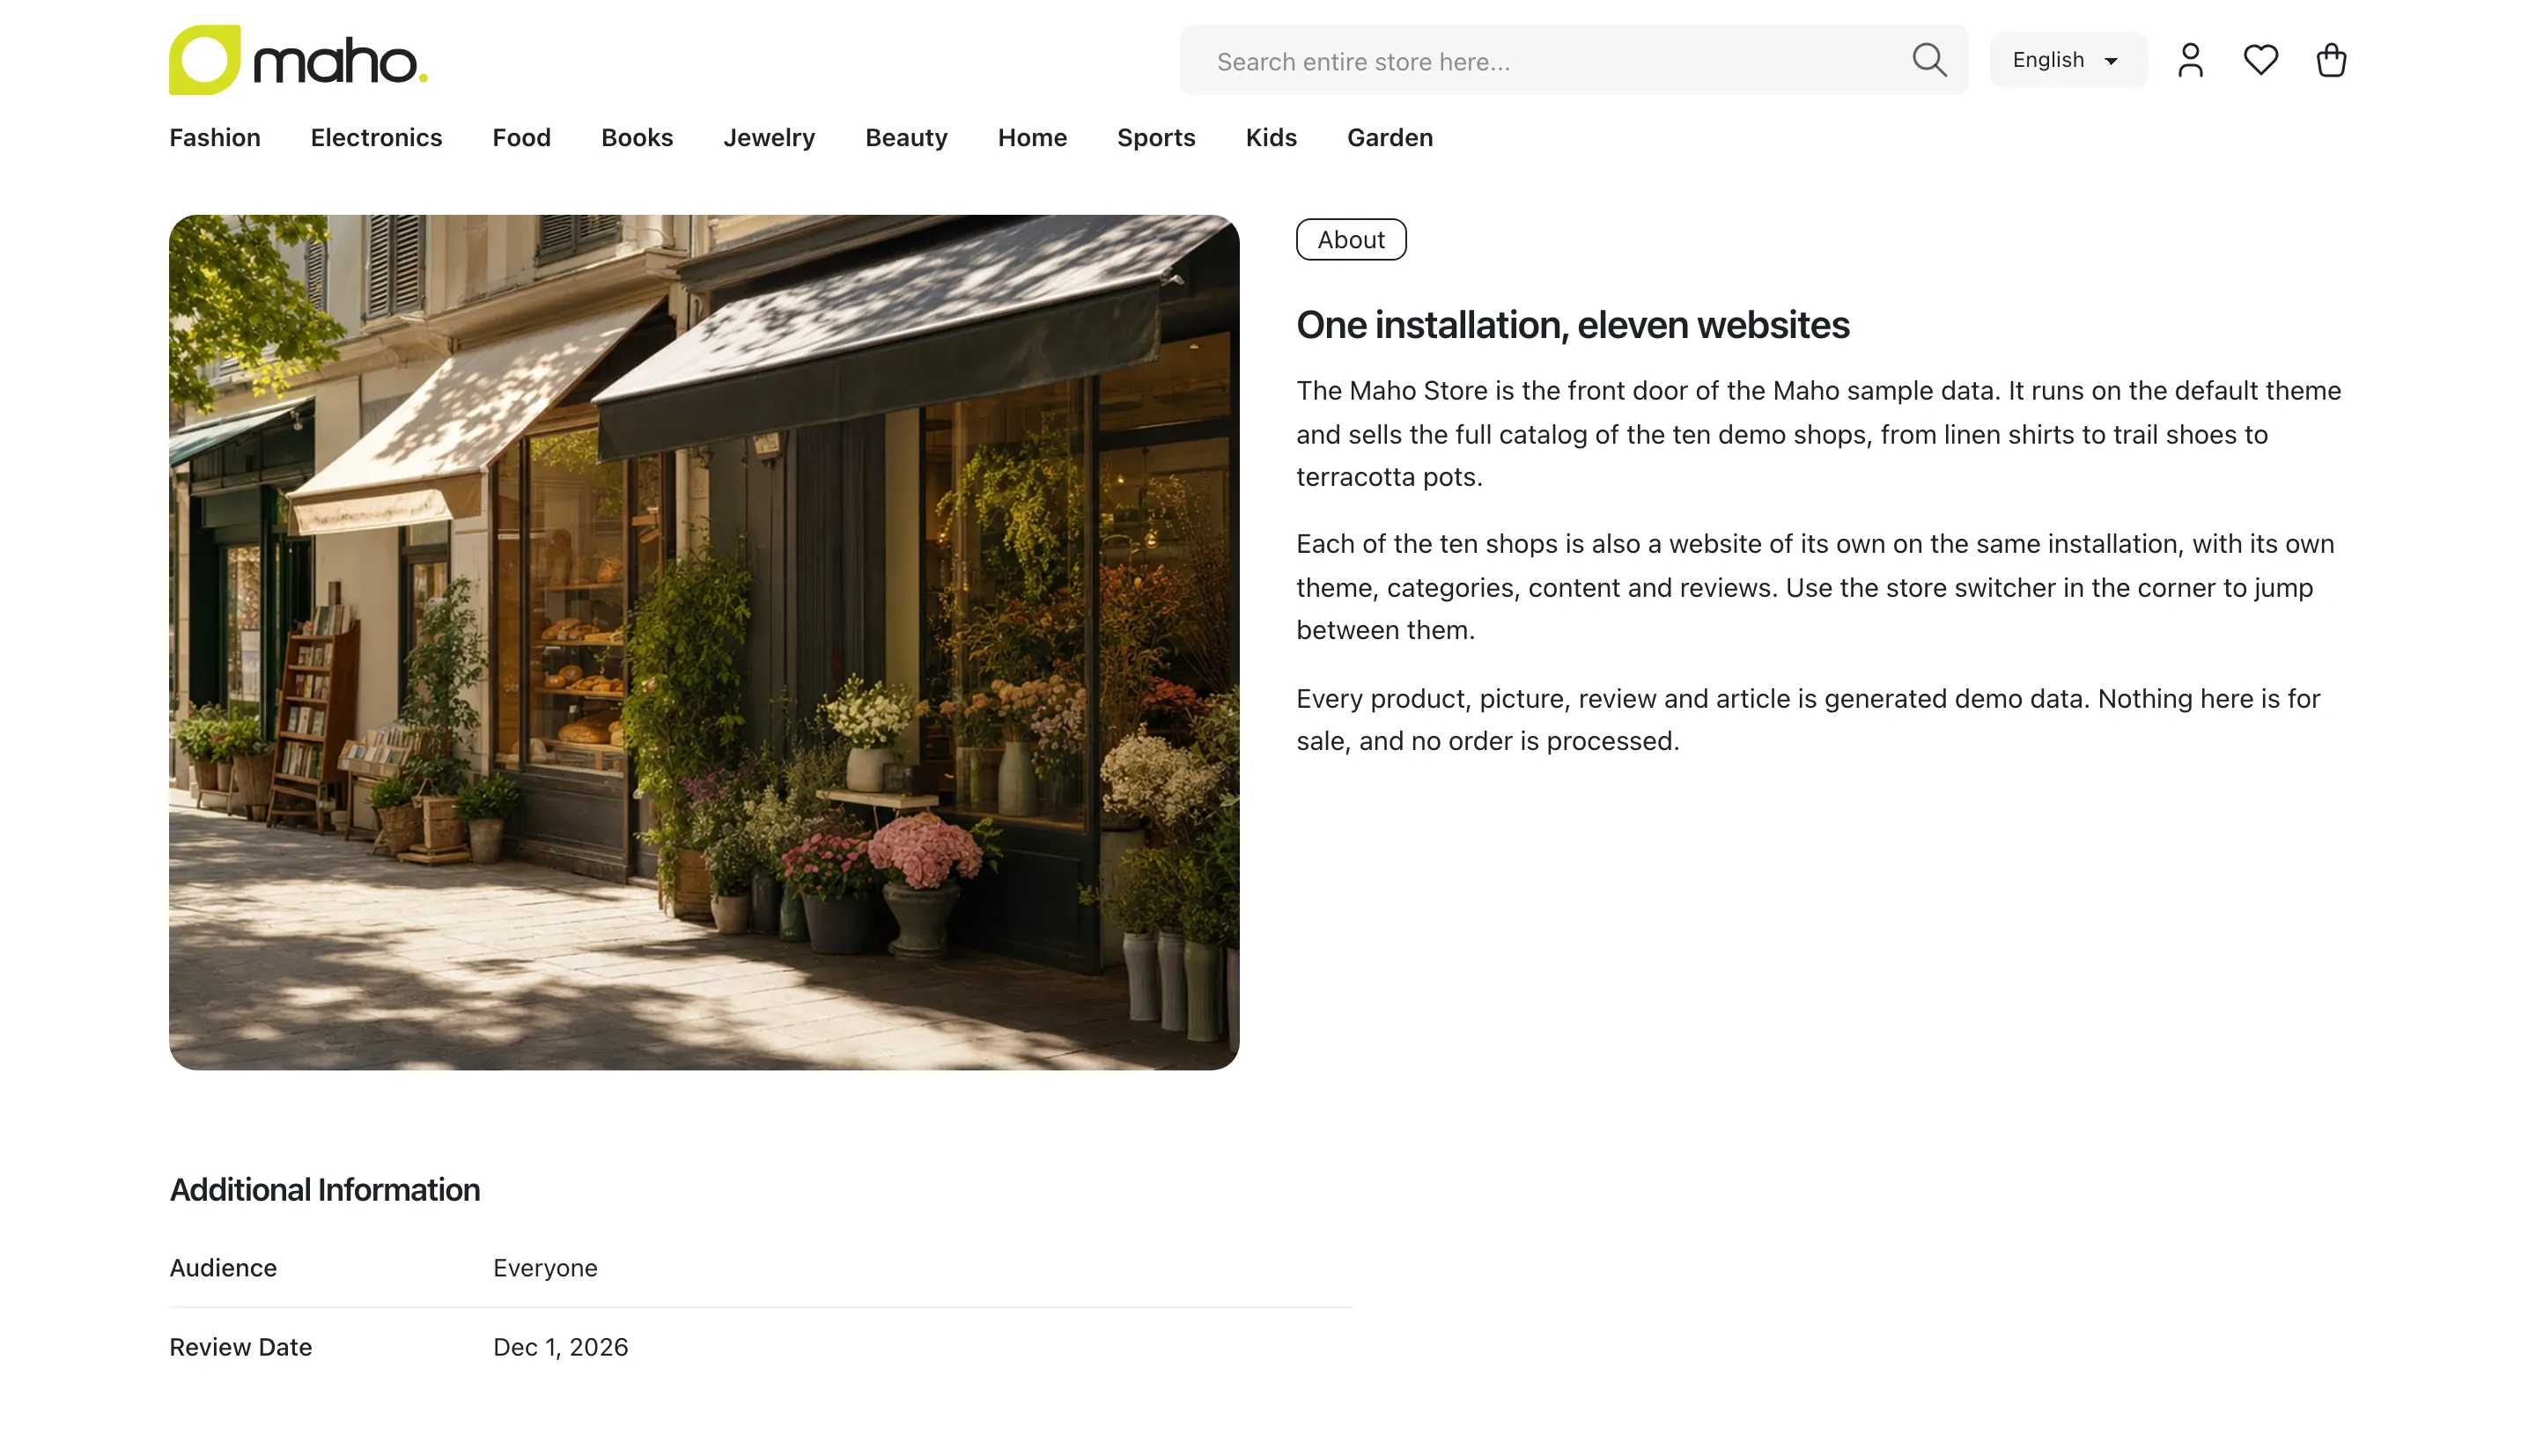
A Text Area value shows under the table, with the label of the attribute as its title, because a long text does not fit in a table.
Set Allow HTML Tags on Frontend to Yes to keep the HTML of a value. The store removes unsafe HTML, such as a script. It also removes codes in braces, such as {{store url=""}}. With No, the page shows the tags as text.
A theme can also show a value in another place of the page. The attribute admin pages page tells a developer how.
Import
The CMS page import file can have a column for each page attribute, with the code of the attribute as its name. A Dropdown or a Multiple Select takes the labels of the options. Separate more than one label with commas. An empty cell keeps the value that the page has. An import refuses a value for an attribute that is not in the set.
The API
The CMS pages of the REST and GraphQL API have the customAttributes field: the values of the page attributes in the set, by code. Only an admin and an API token can read and write it. A Dropdown is the option ID, a Multiple Select a list of option IDs, and a Yes/No true or false.
GET /api/rest/v2/custom-attributes?entityType=cms_page lists the attributes and their options.